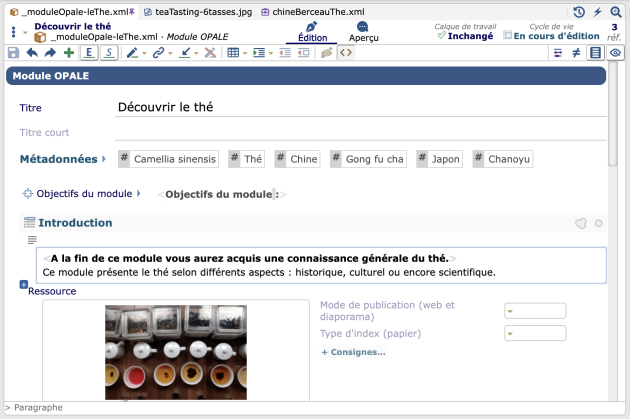
Items edition
This screen presents the interface of the editing area displayed when an item is opened.
Tip -
Click on one area to get in-depth explanations.
Opened items⚓
This bar enables to browse between opened items, materialized as tabs.
Warning -
This tab bar is not available when using the application in plan mode where the items editing interface is mono-item (impossible to open several items simultaneously; browsing is done only by the document plan or by following inter-items links).
See alsoItem header⚓
The header of the active item (opened):
- Identifies the item (title, code, items type icon,...);
- Gives access to options and actions on the item;
- Allows switching between the different views of the item, when available.
Screen - Item header⚓
Note -
This screen introduces the visible banner at the top of the editing area when an item is open. This
headerof the active item enables to access information and functions described below.General actions⚓
The button
 General actions on the item
Copy(then, usingPaste(Ctrl + V), you will be able to duplicate the item in the explorer OR replace the content of an equivalent tag in an other item).Rename...Move...(in the explorer)DeleteReloadDisplay the item network...Export an archive...(.scar format to import it in an other workspace)
Note -
On some types of items and workspaces, this button offers additional options, such as the ones linked to the item's life cycle or to work or derived workspace layers features.
Details⚓
- Enables to identify the item: code, title, type and items type icon,...
- A click on this area displays more information on a window on top: last modification (date? hour? who?) and item path in the explorer.
Ascending items⚓
Enables one to see and access the ascending items (parents) of the opened item.
Item views⚓
The views enable one to switch between various aspects of an item. Each view gives access to the user to different actions or information.
For instance:
The
Editionview: to write or modify the item content.The
Overviewview: to preview the published form of an item or item network. This view is offered for proofreading purposes and can differ slightly from the final web version.The
Ctrlview: to run control operations of contents coherence.
Item views⚓
The views enable one to switch between various aspects of an item. Each view gives access to the user to different actions or information.
For instance:
The
Editionview: to write or modify the item content.The
Overviewview: to preview the published form of an item or item network. This view is offered for proofreading purposes and can differ slightly from the final web version.The
Ctrlview: to run control operations of contents coherence.The
Historyview: to access the modifications history of the item (without using the Compare
Note - Reduced width⚓
If the editing area's width is reduced, then the item's views are displayed at the bottom of the item's header.

Editing bar⚓
The editing bar offers several options and actions on the active item. It is contextual and adapts itself depending on the type of item, if a tag is selected, if the cursor is in the text, etc.
Screen - Generic options of the editing bar⚓
This screen introduces the actions offered by the editing bar on the item overall or on the selected tag.
Save⚓

The modifications save is automated, so in theory you have nothing to do. However, if you want to force a save (to speed it up), click on the button
 Save
SaveTip - Keyboard shortcut⚓
Ctrl + SCancel / Redo⚓

Click on the left arrow to cancel an action or on the right arrow to redo an action.
Previous edition point⚓

The button

Return to previous edit pointallows you to return to where you last edited even if you have navigated to other items since then.For example, if you have corrected a spelling mistake during your browsing of items, a click on this button will bring you back to this correction. If the item has been closed, it will be re-opened. A 2nd click will return to your 1st edition.
+ Insert...⚓

The button
 enables to add a tag in the active item.
See: Insert...
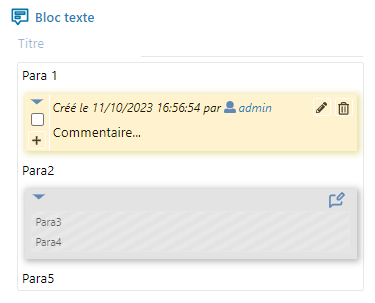
Add a comment⚓
Exclude selection⚓

The button
 enables to exclude the selected element. This feature can be used to delete temporarily content from all the publications and previews, while doing an update, for example.
An excluded element is frozen and can't be modified anymore; it is visible in the editor with its gray aspect. A click on the button
 enables to restore an excluded tag.
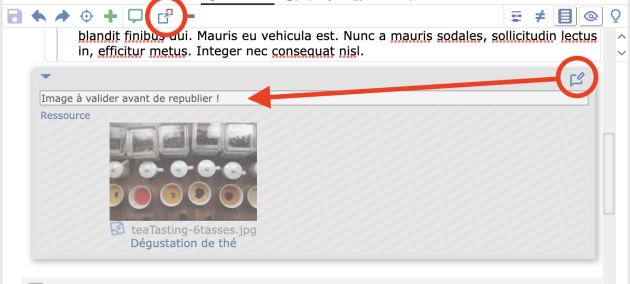
In addition, the
 Comment for this excluded content
Tip -
It is possible to exclude an entire tag from the editing area or simply a paragraph of text inside a block.
Delete the selection⚓

The button
 enables to delete the selected tag.
Tip - Keyboard shortcut⚓
Del.Browse, replace...⚓

Click on this button to display the intern search tool of an item, below the editing area.

Note - Details⚓
You can:
Do textual search (search / replace a character string),
Browse all the links to items or links to a specific item (that you define),
Browse the comments (opened and/or closed).
The occurrences found are:
Highlighted in yellow in the editing area,
Marked as yellow lines in the bar at the right of the editing area.
Tip -
The suitable tool
Browse, replace...is opened automatically when you are in the advanced search window with a corresponding criteria activated (Text,Commented itemorLinking items..., for example).Same when you open an ascending item from the widget
ref., the links to the descending item browing feature is activated automatically.Compare...⚓

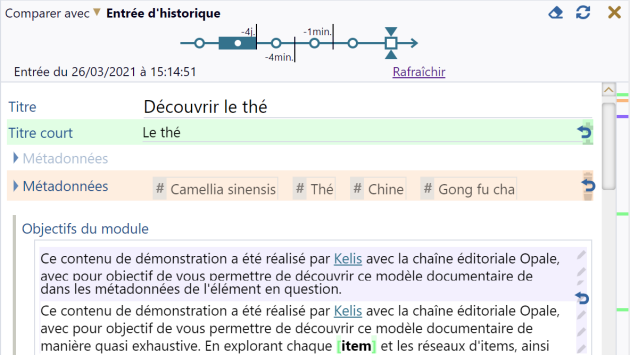
Click on this button to display the comparison tool below the editing bar.
Note - Details⚓
You can compare the item actual content with:
a history entry, to choose with a double-click among the various item history entries,
another item (useful feature to compare the active item with an item of the same type and close in terms of content).
The differences are highlighted in the editing area and marked with colored lines in the bar at the right of the editing area.
The nature of the differences found is symbolized with a color:
In red, the content deletions,
In green, the content additions,
In blue, the content modifications.
Extra - Work layer workspace⚓
In a work layer workspace[2], the tool
Compare...offers an additional option:Compare with...
...enables to...
Reference
Compare the item content in the layer with its content in the reference workspace[3].
Extra - Derived layer workspace⚓
In a derived layer[4], the tool
Compare...offers additional options:Compare with...
...enables to...
Source content (before overload)
Compare the content of an overloaded[5] layer item with the item content in the reference workspace.
Previous state done
Compare the content of a layer item whose status is to review[6] (
 or
or  or
or  ) with its last state finished[7] (
 ,
,  ,
,  ).
).Source content of the previous state done
Compare the content of a layer item whose status is to review (
or or ) with the item content in the reference workspace during its last sate finished .Extra - Life cycle⚓
If your workspace model offers a life cycle for the items, then the state changes are logged and proposed in the history entries line.
Title levels⚓

This option, available on some types of structure items, enables to display and reorganize the active item outline.
See alsoRendering⚓

This option, available on some types of content items, enables to display an editable overview next to the editing area.
This
Renderingmode is close to the publication result (hiding the tags, options,.. of the editing area) to enable a re-reading more smooth and direct of the editorial content.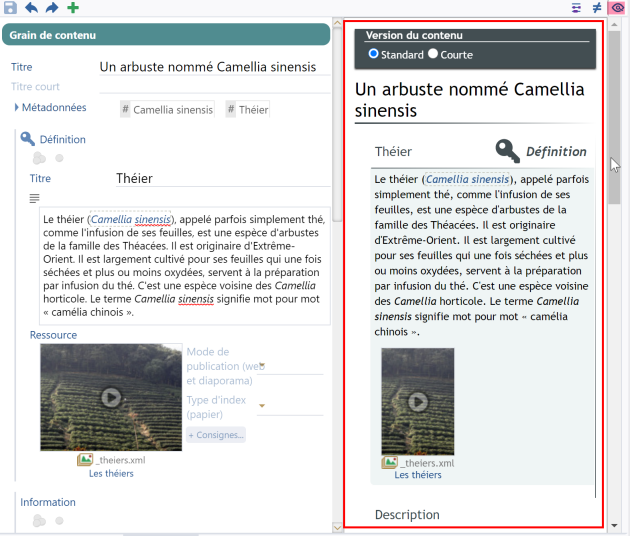
Conseils...⚓

The
 Suggestions...
For example, it is possible to carry out a spelling and grammar check or to check the URLs inserted in the text.
Note -
The "suggestions families" available may vary depending on the document model and the application.
Procedure - Check spelling and grammar⚓
Procedure - Check URLs⚓
This procedure explains how to use the
- Click on the
The families of suggestions are displayed.

- Click on the
Querybutton next toURL control.⚓ - Result
URLs are controlled.
If a URL could not be validated (entry error or inaccessible server) then an information sticker
iis displayed at the level of the link in the entry grid.Note: On hover over the
i, a tooltip details the control.
Example -
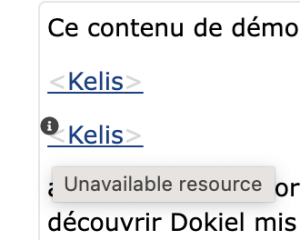
In this example:
The first URL checked is valid.
The second URL could not be validated. Display the link's metadata to check your input and possibly manually check this URL in a browser (useful especially if the link points to a server protected by authentication).
Screen - Options linked to the rich text of Opale editing bar⚓
Enrichments⚓

Enables to enrich the text with a semantic markup[9] that transcribes in publication by a layout recognizable for the reader.
Procedure -
 Mark the text as Important⚓
Procedure -
 Mark the text as Specific⚓
The button

Specific termenables to enrich text with a formatting (italic) enabling to identify a text with a specific meaning; text in foreign language, for example.Procedure -
 Insert in the paragraph...⚓
The button

Insert in the paragraph...enables to enrich text with various intentions:Web address, email, link to an external document (hyperlink insertion)
Quote (formatting: between quotation mark)
Syntax (formatting: font)
Exponent / Hint (formatting)
Internal LaTeX mathematical formula (formatting: formula corresponding to the LaTeX[10] syntax entered)
Additionally, the items
 Type of markup in a paragraph
- Select the word or group of words you want to enrich.⚓
- Click on the button and select the target enrichment.⚓
Extra - Web address, email, link to an external document - details⚓
In the field
URL, web addressof the pop-up window that displays, enter or paste the aim of your link (https://...,mailto:...)In the field
Title, enter a text that will be displayed in the popup when you mouse-over the link in the published text.(Option)
Linked document extrasenables to enter clarifications if the URL leads to a desktop document:Document format: clarify the type of document pointed (pdf?...).
Weight: enter the file weight (in Ko), in order to anticipate the downloading time.Language (code): clarify the language code of the file, especially for the screen readers (by default, the site is considered as French language).Use the standardized language codes, such as: fr or fr-FR (language code-country code); a list of suggestions displays as you enter.
Click on
X Close.
- Result
The enrichment is implemented on the selected text.
Links (references and side notes)⚓

Enables to do a reference to another item on words of the text:
Link to a reference item[11]:
Link to a document, enables to link a desktop file (PDF file, for example) in order to offer it for download in the web media.
Reference to a resource, enables to display a multimedia resource (image, video...) when clicking on the web media link. In static media, these resources can be published in annex.
Reference to a content element, enables to display a course part in a pop-up window when clicking on the web media link. In the static media, a reference to the corresponding page number is added; if the element is not attached to the module outline these elements can be published in annex.
Procedure - Insert a reference⚓
This procedure explains how to link a reference in the rich text.
- Select the word or group of words on which you want to link a reference.⚓
- Click on the button
 and select the type of target reference.⚓
The list of items of your workspace that correspond to this type of link displays.
- Select the item to link among the list offered.⚓
Tip -
If your search is unsuccessful, click on

Create an item...to create a new item. - Result
The item selected is linked.
Insert an item...⚓

Enables to link an item between two words of the text:
Mathematical formula (Odf or LaTeX)
Small image, enables to drag a small image in the editorial content (a logo or an icon, for example).
Procedure - Insert an item in the paragraph⚓
This procedure explains how to link an item in a paragraph, i.e. between 2 words of the rich text.
- Place your cursor where you want to link an item.⚓
- Click on the button
 and select the target item type.⚓
The list of items of your workspace that correspond to this type of link displays.
- Select the item to link among the list offered.⚓
Tip -
If your search is unsuccessful, click on
Create an item...to create a new item. - Result
The selected item is linked.
Eliminate the parent tag⚓

Procedure - Delete a textual enrichment⚓
This procedure explains how to delete an inline markup[17].
Insert a table...⚓

Procedure - Insert a table⚓
This procedure explains how to insert a table in the rich text.
- Place your cursor where you want to insert a table.⚓
- In the editing bar, click on

Insert a tableand selectTable.⚓ - With the grid that displays, define the inital size of your table (number of lines and columns).⚓
- Result
The table is added in your text. You can edit its cells, give it a title (by placing your cursor above the table).
Note - Modify the table⚓
When your cursor is in a table, click on

Edit the tableto display a dedicated editing bar, enabling to:modify the width of the columns,
insert new columns or lines,
delete columns or lines,
give characteristics to a line or column (header), a cell (word, number),
merge / unmerge cells.
Click on
 to leave the mode
 Edit the table.Extra - Row / column / cell typing⚓
The typing available in tables provides the reader with visual information (important cell, heading row or column, etc.), but is fundamentally designed to improve the digital accessibility of media. Indeed, typing provides identification in a text-to-speech reading context, enabling the user to understand what a table cell corresponds to.
Row types :
Row
Row in header
Column types :
Columns
Columns in header
Cell types
Text cell (default style)
Word cell (horizontally aligned content)
Number cell (right-aligned content)
Extra - Row / column / cell typing⚓
The typing available in tables provides the reader with visual information (important cell, heading row or column, etc.), but is fundamentally designed to improve the digital accessibility of media. Indeed, typing provides identification in a text-to-speech reading context, enabling the user to understand what a table cell corresponds to.
Row types :
Normal
Header
Result
Column types :
Normal
Result
Cell types
Text cell (default style)
Word cell (horizontally aligned content)
Number cell (right-aligned content)
In addition, SCENARI allows you to insert Layout tables, which are unique in that they have no visible borders when published. They can be used to display facing content (two images side by side, for example). However, from the point of view of digital accessibility, it is advisable to keep their use to a strict minimum.
Extra - Row / column / cell typing⚓
The typing available in tables provides the reader with visual information (important cell, heading row or column, etc.), but is fundamentally designed to improve the digital accessibility of media. Indeed, typing provides identification in a text-to-speech reading context, enabling the user to understand what a table cell corresponds to.
Row types :
Row (normal)
Column header
Column types :
Column (normal)
Line header
Cell types
Text cell (default style)
Important cell (highlighted style)
Word cell (horizontally aligned content)
Number celle (right-aligned content)
In addition, SCENARI allows you to insert Layout tables, which are unique in that they have no visible borders when published. They can be used to display facing content (two images side by side, for example). However, from the point of view of digital accessibility, it is advisable to keep their use to a strict minimum.
Navigation in the table⚓
Ctrl + Shift + navigation arrowto select the entire end of a row or column when editing a table structure.Shift + Cmd + navigation arrowon MacOS.
Insert a list...⚓

Procedure - Insert a list⚓
This procedure explains how to insert a list in the rich text.
Laying out the existing text
Select several lines of text.
Click on

Insert a list.Select the type of target list:
Simple list (mono-paragraph)
Bullet list (multi-paragraphs)
Numbered list (multi-paragraphs)
Create a new list
Click on
Insert a list.Select the type of target list:
Simple list (mono-paragraph)
Bullet list (multi-paragraphs)
Numbered list (multi-paragraphs)
Enter the first item content of this list.
Then:
Type
Enterto write in another paragraph of this list item.(It also enables to create sub-lists, by clicking again on
.)Type
Enter2 times to insert another item in this list.Type
Enter3 times to leave from this list.
Multi-paragraph quote⚓

Procedure - Insert a multi-paragraph quote⚓
This procedure explains how to insert a multi-paragraph quote in rich text.
Select one or more paragraphs of text.
Click on
 Multi-paragraph quote
 Result
In publication, formatting will be automatically associated with the paragraphs of text identified as a multi-paragraph quote.
Show/hide the metadata⚓

Procedure - Show/hide the metadata⚓
The button
 Show/hide the metadata
Specific termthat enables to specify the language).Hide / show the text structure⚓

Procedure - Hide / show the text structure⚓
Show the text structure enables to:
See the enrichment added better (where they start and end) and can help you find errors, especially empty tags.
Make the tags breadcrumb trail appears below the editing area. This breadcrumb trail can be used to select elements (lists, tables...) and cut them to move them properly and easily.
Screen - Options linked to the rich text of Dokiel editing bar⚓
Enrichments...⚓

Enables to enrich the text with a semantic markup[9] that transcribes in publication by a layout recognizable for the reader.
Procedure -
Mark the text as Important⚓Procedure -
Mark the text as Specific⚓The button
Specific termenables to enrich text with a formatting (italic) enabling to identify a text with a specific meaning; text in foreign language, for example.Procedure - Insert a
Enrichment or a  Specific enrichment⚓
The button
Enrichmentenables to enrich text with various intentions:Exponent (formatting)
Subscript (formatting)
Internal LaTeX mathematical formula (formatting: formula corresponding to the LaTeX[10] syntax entered)
The button

Specific enrichmentenables to link to the text significant formatting for the document reader and so enables to reduce the number of screenshots:Textual tab
Textual button
Radio-button
Checkbox
Input field
Choice list
Keyboard key
Menu path
File path/name
Window name...
Term
Command line
Label
Tip - Add a type of markup⚓
Items
External link⚓

Procedure -
 Insert an external link⚓
The button
 Web address, email, link to an external document
- Select the word or group of words on which you want to add an external link.⚓
- Click on the button.⚓
- In the field
URL, web addressof the pop-up window that displays, enter or paste the target of your link (https://...,mailto:...)⚓ - In the field
Title, enter a text that will be displayed in the popup when you mouse-over the link in the published text.⚓ - If the URL leads to a desktop document, you can enter clarifications on this document in the field
Linked document extras.⚓Note - Details⚓
Document format: specify the type of document pointed (pdf?...).Weight: enter the file weight (in Ko), in order to anticipate the downloading time.Language (code): specify the language code of the file, especially for the screen readers (by default, the site is considered as French language).Use the standardized language codes, such as: fr or fr-FR (language code-country code); a list of suggestions displays as you enter.
- Click on
X Closeto leave the window.⚓ - Result
The external link is added on the selected text.
Links (references and footnotes)⚓

Enables to do a reference to another item on words of the text:
Link to a reference item[11]:
Reference to a document, enables to link a desktop file (PDF file, for example) in order to offer it for download in the web media.
Reference to a rich content, enables to create a reference in the document. A course part in a pop-up window when clicking on the web media link. In the static media, a reference to the corresponding page number is added; if the element is not attached to the module outline these elements can be published in annex.
Procedure - Insert a reference⚓
This procedure explains how to link a reference in the rich text.
- Select the word or group of words on which you want to link a reference.⚓
- Click on the button and select the type of target reference.⚓
The list of items of your workspace that correspond to this type of link displays.
- Select the item to link among the list offered.⚓
Tip -
If your search is unsuccessful, click on
Create an item...to create a new item. - Result
The item selected is linked.
Variable⚓

Procedure - Insert a variable⚓
- Place your cursor where you want to insert a
Variableitem.⚓ - Click on the button
 Variable
The list of
Variableitems of your workspace displays.
- Select the item to link among the list offered.⚓
Tip -
If your search is unsuccessful, click on
Create an item...to create a new item - Result
The selected item is linked.
See alsoEliminate the parent tag⚓

Procedure - Delete a textual enrichment⚓
This procedure explains how to delete an inline markup[17].
Insert an illustration...⚓

Procedure -
 Insert an illustration⚓
The button
 Insert an illustration
Illustration: multimedia resource (image or images succession, video or audio file, OpenDocument file or Computer listing) added between 2 text paragraphs and published in full width.
Small image: enables to add a small image in the editorial content (a logo or an icon, for example).
- Place your cursor where you want to add an item.⚓
- Click on the button and select the target item type.⚓
The item list of your workspace that correspond to this type of link displays.
- Select the item to link among the list offered.⚓
Tip -
If your search is unsuccessful, click on
Create an item...to create a new item - Result
The selected item is linked.
Insert a list...⚓

Procedure - Insert a list⚓
This procedure explains how to insert a list in the rich text.
Laying out the existing text
Select several lines of text.
Click on
Insert a list.Select the type of target list:
Simple list (mono-paragraph)
Bullet list (multi-paragraphs)
Numbered list (multi-paragraphs)
Create a new list
Click on
Insert a list.Select the type of target list:
Simple list (mono-paragraph)
Bullet list (multi-paragraphs)
Numbered list (multi-paragraphs)
Enter the first item content of this list.
Then:
Type
Enterto write in another paragraph of this list item.(It also enables to create sub-lists, by clicking again on
.)Type
Enter2 times to insert another item in this list.Type
Enter3 times to leave from this list.
Insert a table...⚓

Procedure - Insert a table⚓
This procedure explains how to insert a table in the rich text.
- Place your cursor where you want to insert a table.⚓
- In the editing bar, click on
Insert a tableand selectTable.⚓ - With the grid that displays, define the inital size of your table (number of lines and columns).⚓
- Result
The table is added in your text. You can edit its cells, give it a title (by placing your cursor above the table).
Note - Modify the table⚓
When your cursor is in a table, click on
Edit the tableto display a dedicated editing bar, enabling to:modify the width of the columns,
insert new columns or lines,
delete columns or lines,
give characteristics to a line or column (header), a cell (word, number),
merge / unmerge cells.
Click on
to leave the mode Edit the table.Extra - Row / column / cell typing⚓
The typing available in tables provides the reader with visual information (important cell, heading row or column, etc.), but is fundamentally designed to improve the digital accessibility of media. Indeed, typing provides identification in a text-to-speech reading context, enabling the user to understand what a table cell corresponds to.
Row types :
Row
Row in header
Column types :
Columns
Columns in header
Cell types
Text cell (default style)
Word cell (horizontally aligned content)
Number cell (right-aligned content)
Extra - Row / column / cell typing⚓
The typing available in tables provides the reader with visual information (important cell, heading row or column, etc.), but is fundamentally designed to improve the digital accessibility of media. Indeed, typing provides identification in a text-to-speech reading context, enabling the user to understand what a table cell corresponds to.
Row types :
Normal
Header
Result
Column types :
Normal
Result
Cell types
Text cell (default style)
Word cell (horizontally aligned content)
Number cell (right-aligned content)
In addition, SCENARI allows you to insert Layout tables, which are unique in that they have no visible borders when published. They can be used to display facing content (two images side by side, for example). However, from the point of view of digital accessibility, it is advisable to keep their use to a strict minimum.
Extra - Row / column / cell typing⚓
The typing available in tables provides the reader with visual information (important cell, heading row or column, etc.), but is fundamentally designed to improve the digital accessibility of media. Indeed, typing provides identification in a text-to-speech reading context, enabling the user to understand what a table cell corresponds to.
Row types :
Row (normal)
Column header
Column types :
Column (normal)
Line header
Cell types
Text cell (default style)
Important cell (highlighted style)
Word cell (horizontally aligned content)
Number celle (right-aligned content)
In addition, SCENARI allows you to insert Layout tables, which are unique in that they have no visible borders when published. They can be used to display facing content (two images side by side, for example). However, from the point of view of digital accessibility, it is advisable to keep their use to a strict minimum.
Navigation in the table⚓
Ctrl + Shift + navigation arrowto select the entire end of a row or column when editing a table structure.Shift + Cmd + navigation arrowon MacOS.
Show/hide metadata⚓

Procedure - Show/hide the metadata⚓
The button
Specific termthat enables to specify the language).Hide / show the text structure⚓

Procedure - Hide / show the text structure⚓
Show the text structure enables to:
See the enrichment added better (where they start and end) and can help you find errors, especially empty tags.
Make the tags breadcrumb trail appears below the editing area. This breadcrumb trail can be used to select elements (lists, tables...) and cut them to move them properly and easily.
Screen - Options linked to the rich text of Optim editing bar⚓
Highlighted⚓
Specific term⚓

Procedure -
Mark the text as Specific⚓The button
Specific termenables to enrich text with a formatting (italic) enabling to identify a text with a specific meaning; text in foreign language, for example.Insert in the paragraph...⚓

The menu
Insert in the paragraph...allows one to enrich the text with:A reference link:
Definition(to a Définition
Bibliography(to a Document
Internal reference(to a common item or a resource)
An external link:
Web address, email, link to an external documentA semantic intention:
Citation(formatting: quotation marks)Exponent / Subscript(formatting)
A
Small image(to insert a logo or an icon between two words, for instance)
Additionally, the items
Procedure -
Insert a reference link⚓- Select the word or group of words you want to enrich.⚓
- Click on the button and select the targeted type of link.⚓
Type de lien
Détails
DefinitionAllows you to link reference items[11] (
BibliographyInternal referenceAllows you to link a common item or a multimedia resource without integrating it into the document but allowing it to be displayed on click for dynamic outputs (in order to allow the Internet user to download it, for example) and to publish it in annex for static supports (unless the item in question is published elsewhere in the document, in which case a mention "(see page XX)" is displayed).
The list of items in your workspace that correspond to this type of link is displayed.
- Select the item to link from the list.⚓
Tip -
If your search proves unsuccessful, click on
- Result
The selected item is linked.
Procedure -
Insert an external link⚓- Select the word or group of words you want to enrich.⚓
- Click on the button and select
Web address, email, link to an external document.⚓ - In the
URL, web addressfield of the window that appears, type or paste the target of your link (https://...,mailto:...).⚓ - In the
Titlefield, enter a text that will be displayed in the popup window when hovering over the link in the published text.⚓ - If the URL leads to an office document, you can enter details about this document in the
Linked document extrastag.⚓Note - Details⚓
Document format: specify the type of document pointed to (pdf?...).Weight: enter the weight (in KB) of the file, in order to anticipate the download time.Language (code): specify the language code of the file, especially for screen readers.Use standardized language codes, such as: fr or fr-FR (language code-country code); a list of suggestions appears as you type.
- Click on
X Closeto exit the window.⚓ - Result
The external link is added to the selected text.
Procedure -
Insert a small image⚓- Place your cursor where in the text you want to insert the small image.⚓
- Click on the button and select
Small image.⚓The list of items in your workspace that correspond to this type of link is displayed.
- Select the item to link from the list.⚓
Tip -
If your search proves unsuccessful, click on
- Result
The selected item is linked.
Procedure -
Insert a semantic intention⚓Variable⚓

Procedure - Insert a variable⚓
This procedure explains how to insert a
 Variable in the text.
- Place your cursor at the place in the text where you want to insert a
- Click on the button
The list of items
Variablein your workspace is displayed.
- Select the item to link from the proposed list.⚓
Tip -
If your search proves unsuccessful, click on
- Result
The selected item is linked; in publication, the value of the variable will be automatically inserted into the text.
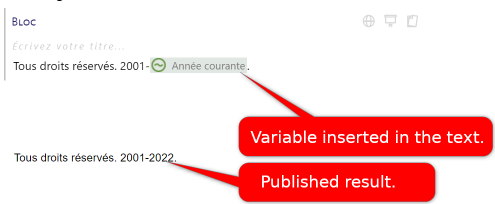
Example of use of a Variable
Delete a textual enrichment⚓

Procedure - Delete a textual enrichment⚓
This procedure explains how to delete an inline markup[17].
Insert a list...⚓

Procedure - Insert a list⚓
This procedure explains how to insert a list in the rich text.
Laying out the existing text
Select several lines of text.
Click on
Insert a list.Select the type of target list:
Simple list (mono-paragraph)
Bullet list (multi-paragraphs)
Numbered list (multi-paragraphs)
Create a new list
Click on
Insert a list.Select the type of target list:
Simple list (mono-paragraph)
Bullet list (multi-paragraphs)
Numbered list (multi-paragraphs)
Enter the first item content of this list.
Then:
Type
Enterto write in another paragraph of this list item.(It also enables to create sub-lists, by clicking again on
.)Type
Enter2 times to insert another item in this list.Type
Enter3 times to leave from this list.
Insert a table...⚓

Procedure - Insert a table⚓
This procedure explains how to insert a table in the rich text.
- Place your cursor where you want to insert a table.⚓
- In the editing bar, click on
Insert a tableand selectTable.⚓ - With the grid that displays, define the inital size of your table (number of lines and columns).⚓
- Result
The table is added in your text. You can edit its cells, give it a title (by placing your cursor above the table).
Note - Modify the table⚓
When your cursor is in a table, click on
Edit the tableto display a dedicated editing bar, enabling to:modify the width of the columns,
insert new columns or lines,
delete columns or lines,
give characteristics to a line or column (header), a cell (word, number),
merge / unmerge cells.
Click on
to leave the mode Edit the table.Extra - Row / column / cell typing⚓
The typing available in tables provides the reader with visual information (important cell, heading row or column, etc.), but is fundamentally designed to improve the digital accessibility of media. Indeed, typing provides identification in a text-to-speech reading context, enabling the user to understand what a table cell corresponds to.
Row types :
Row
Row in header
Column types :
Columns
Columns in header
Cell types
Text cell (default style)
Word cell (horizontally aligned content)
Number cell (right-aligned content)
Extra - Row / column / cell typing⚓
The typing available in tables provides the reader with visual information (important cell, heading row or column, etc.), but is fundamentally designed to improve the digital accessibility of media. Indeed, typing provides identification in a text-to-speech reading context, enabling the user to understand what a table cell corresponds to.
Row types :
Normal
Header
Result
Column types :
Normal
Result
Cell types
Text cell (default style)
Word cell (horizontally aligned content)
Number cell (right-aligned content)
In addition, SCENARI allows you to insert Layout tables, which are unique in that they have no visible borders when published. They can be used to display facing content (two images side by side, for example). However, from the point of view of digital accessibility, it is advisable to keep their use to a strict minimum.
Extra - Row / column / cell typing⚓
The typing available in tables provides the reader with visual information (important cell, heading row or column, etc.), but is fundamentally designed to improve the digital accessibility of media. Indeed, typing provides identification in a text-to-speech reading context, enabling the user to understand what a table cell corresponds to.
Row types :
Row (normal)
Column header
Column types :
Column (normal)
Line header
Cell types
Text cell (default style)
Important cell (highlighted style)
Word cell (horizontally aligned content)
Number celle (right-aligned content)
In addition, SCENARI allows you to insert Layout tables, which are unique in that they have no visible borders when published. They can be used to display facing content (two images side by side, for example). However, from the point of view of digital accessibility, it is advisable to keep their use to a strict minimum.
Navigation in the table⚓
Ctrl + Shift + navigation arrowto select the entire end of a row or column when editing a table structure.Shift + Cmd + navigation arrowon MacOS.
Insert an item...⚓

Procedure -
Insert an item⚓The
Image, graph, table, equation: allows you to insert an Image item (or Remote Image) or an OpenDocument item (odf equation, odt workbook or odg graph) between 2 paragraphs of text and published in full width.
Animation: allows you to insert a Video (or Remote Video), Audio (or Remote Audio), Embedded Website or Remote Web Module item between 2 paragraphs of text and published in full width.
- Place your cursor where you want to insert an item.⚓
- Click on the button and select the target link type.⚓
The list of items in your workspace that correspond to this type of link is displayed.
- Select the item to link from the list.⚓
Tip -
If your search proves unsuccessful, click on
- Result
The selected item is linked.
Hide/show the metadata⚓

Procedure - Show/hide the metadata⚓
The button
Specific termthat enables to specify the language).Hide/show the text structure⚓

Procedure - Hide / show the text structure⚓
Show the text structure enables to:
See the enrichment added better (where they start and end) and can help you find errors, especially empty tags.
Make the tags breadcrumb trail appears below the editing area. This breadcrumb trail can be used to select elements (lists, tables...) and cut them to move them properly and easily.
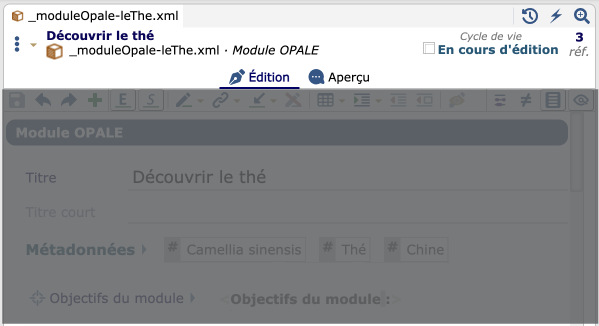
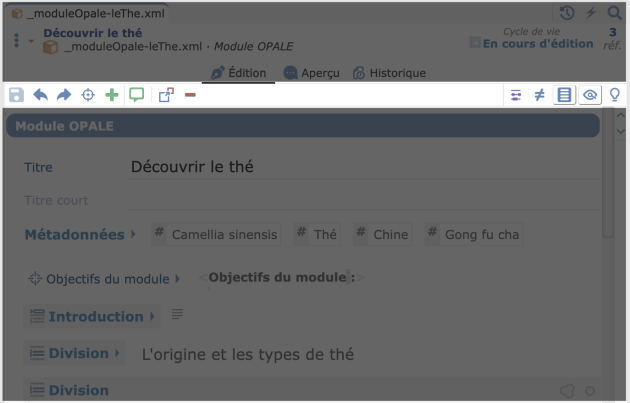
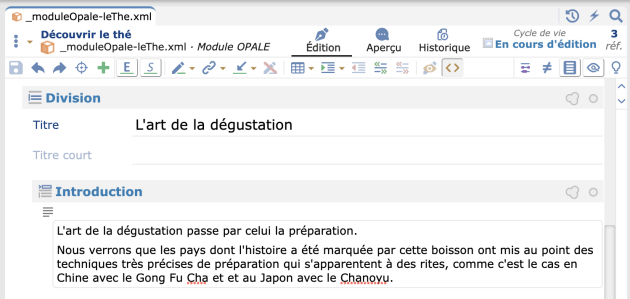
Editing area⚓
The editing area enables the user to see, define and modify the item's content.
Screen - Editing area⚓
Note -
This screen introduces the available features from the editing area[22] of an item.
Open / close a tag⚓
Double-click on the name of an editing area element to close or open it (hide or display its sub-structure and its content).
Note: A closed element is identified by its « grayed out » look and by an arrow next to its name.
Actions on the active tag⚓
Note - Common actions⚓
Note -
 Replace or transform...⚓
The button
 offers the options of transformation, internalization and externalization available on the active tag.
Note -
 Insert... (contextual)⚓
Find the insert feature, contextualised, before and after the active tag.
Important: The offered list in this case only contains the tags that can be added in this area.
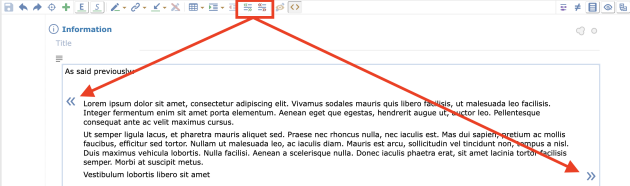
Use the filters⚓
The filters

 of SCENARI enable to easily create a short version and a standard version of a same module.
Hard space⚓
Special characters⚓
Procedure - Insérer un caractère spécial⚓
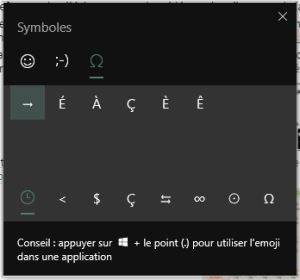
This procedure explains how to insert special characters in the text (accented capital letter, Greek alphabet, symbol, emoji...):
Place the cursor on the target area of the text.
Hold the key
⇧ Shiftand do a right-click.→ The browser native contextual menu displays.
Select
Emoji.In the window that displays, choose the tab of your choice: emoji, kaomoji or symbol (where you will find accented capital letters and punctuation signs, for example).
Click on the element you want, to add it at your cursor place in the text, then close the window.
Link items⚓
The editing area enables one to link items between them in order to create the document's plan or to enrich its content.
See alsoError⚓
Errors are identified by a red background in the editing area and the icon
 .
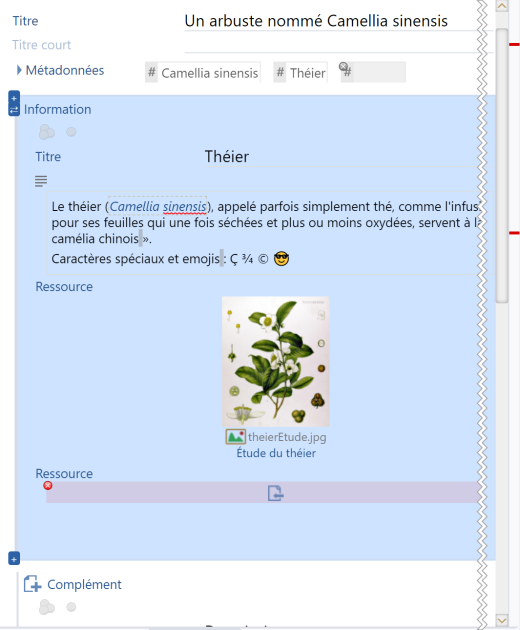
.Example -
In this example, the error is a mandatory element not filled in: a tag
Resourcewas added but no resource item was linked. To correct this error, you have to link an item on the insertion icon OR to deleta the tag
 Resourceif it is useless.Going through the errors, suggestions...⚓
The various errors of a document (
) are materialized by red lines in the sidebar at the item's right.Put your cursor on a line to obtain information on the errors nature.
Click on a line to select the error in the document.
Note -
If another option is active:
-
Suggestions, 
Browseoccurrences of a text search, links to an item or comments,Compare,
then, this option takes precedence over the errors in the sidebar and the lines change color and adapt to the active option.
Tip -
The
NextandPreviousbuttons, at the top of the sidebar, allow you to navigate between the occurrences found within the item.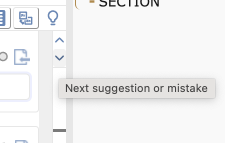


This procedure explains how to use the
 Suggestions
 Suggestions
Families of suggestions are displayed.
Querynext toSpelling and grammar.⚓LanguageToolsuggestions appear on a colored background in the input grid. Suggestions...
Tip -
Keyboard shortcut: Place the cursor in a highlighted word and type the
F4key on the keyboard to display the hint.The
NextandPreviousbuttons, at the top of the sidebar, allow you to navigate between the occurrences found within the item while displaying the advice window.A pop-up window explains the analysis and offers to replace with the right words (when clicking on the suggestion) or to ignore this advice.